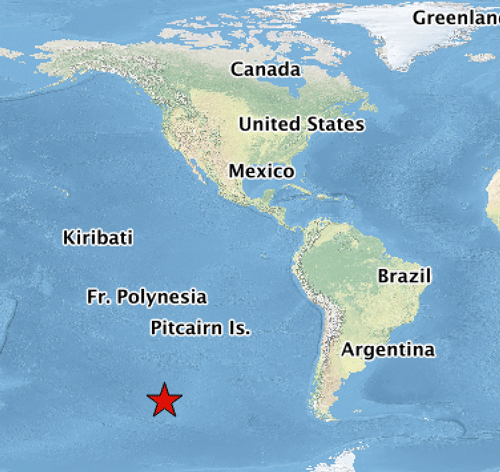
If you have a single set of coordinates that you want to map using QGIS, here are step-by-step instructions on how to do that.
Geocoding Point Nemo as an Example
Point Nemo is a pole of inaccessibility that marks the further location from land in the ocean. Located in the South Pacific Ocean, this location is known as the ocean pole of inaccessibility.
The name Point Nemo originates from Jules Verne’s Captain Nemo who roams the oceans in his submarine. Nemo in Latin means “no one”. Point Nemo can be found at the coordinates 48°52.6′S 123°23.6′W.
Convert Lat/Long From Degrees Minutes Seconds to Decimal Degrees
The first thing that needs to be done is to convert the latitude and longitude coordinates of Point Nemo, which are in Degrees Minutes Seconds, to Decimal Degrees. There are many online tools you can use such as this US Government one from the FCC.
Enter the individual values for degrees, minutes, and seconds into the appropriate boxes. If your latitude is south, add a minute (-) sign in front of the degrees value. If your longitude is west, add a minus (-) sign in front of the degrees values in that box. Hit the “convert to decimal” button. Save the coordinate values return for later in this tutorial.

Install the Numerical Vertex Edit Plugin
Startup QGIS. Next, from the top menu navigate to Plugins –> Manage and Install Plugins.

From the repository window that appears, type in “Numerical Vertex Edit”. Select the plugin from the list and then select “install plugin” from the bottom buttons.
Once the button installs, you are ready to set up a new GIS data file to map your coordinates to.
Map Coordinates with QGIS
Located along the border to the left of the legend window are a series of data icons. The very bottom icon lets you create a new GIS data file. Click the down arrow next to the icon and select “add new shapefile” from the options.
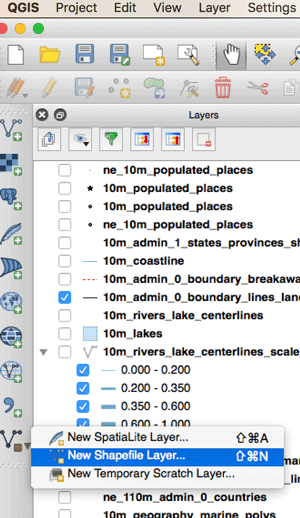
From the pop-up window select point. You can also change the coordinate system (the default is the set coordinate system of your QGIS file) and add any attribute fields you want. Hit the “ok” button. In the second window give your point shapefile a name and designate which directory it should be stored in.
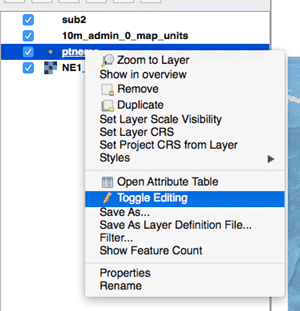
Now you have an empty shapefile that is accessible from the legend window where the rest of your GIS data layers for your QGIS file are listed. Select the new created layer and right-click. From the menu that appears, select “toggle editing” from the list.
Now you are ready to add a point. With editing toggled on (there should be a pencil icon immediately to the left of the layer and the editing tools are no longer faded) select the “add feature” icon.
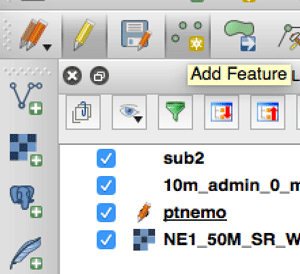
Pick a point anywhere on your map and click. A window will popup where you can enter any attributes you want to (this is optional) and hit “ok”. You now have a point on your map. Next, we want to move the point to the correct location based on the decimal degree values you obtained earlier.
Now select the Numerical Vertex Edit icon which is located as the last icon where the edit toolbar is.

The cursor will turn into a target icon. Move the cursor so that the icon is directly over your new point. Click the mouse and the “move vertex feature” window will appear. Copy and paste your decimal degree values and then click “ok”.
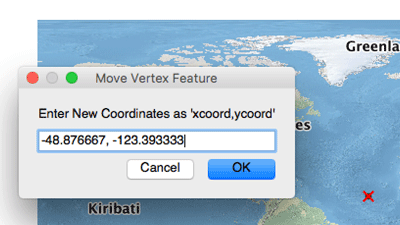
Your point will now be remapped to the correct coordinate location. If your point is not where you expect it to be, check to make sure that you have your coordinates in the proper order and are correctly marked with a minus sign if they are in the western or southern hemispheres. Also, remember to save your edits to write the new point to your shapefile.
