The release of QGIS version 3.10 brought with it the native capability to add leader lines to labels. Prior to this release, adding leader lines involved have to add Geometry Generators and some lines of code (step-by-step instructions on how to do this for those running QGIS 3.4 and earlier are provided by Randy Hale).
Adding leader lines (or call-outs) to your labels, is handy when you are trying to label a small area, or you have too many labels to fit into the area you need to label. Adding leader lines adds readability to your map when dealing with crowded labels.
Here are step-by-step instructions on how to add leader lines to labels using QGIS 3.10.
Turn on Labels in QGIS
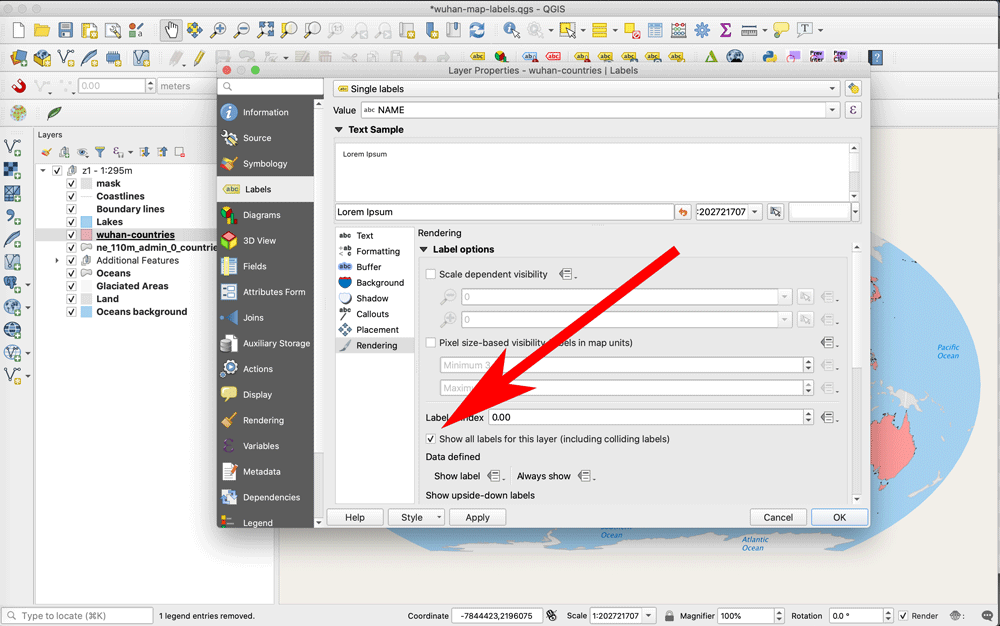
First, you want to turn on labels and force the label renderer to add all labels, even if they are overlapping. Right-click on the layer and select the properties option from the menu. Then click on Labels and set up the field you want to label on. Under rendering, make sure the “Show all labels” box is checked.

As you can see from the map below, the labeling is unreadable in areas where there are too many labels.

Enable the Label Callout Function in QGIS
The next step is to enable the label callouts function. Head back to properties –> labels and select “callouts”. Then make sure the “Draw callouts” option is clicked. You can choose from two line shapes – a simple linear line or Manhattan lines (which transforms angles to a 45 degree line). You can also set the line style and decide where you want the line to originate from your feature.

Now you are ready to move your labels so they are more readable. Before you start this step, make sure you have a field in your layer that contains unique values for each of your features. Note the field name as you will need this.
Turn on the Label Toolbar in QGIS
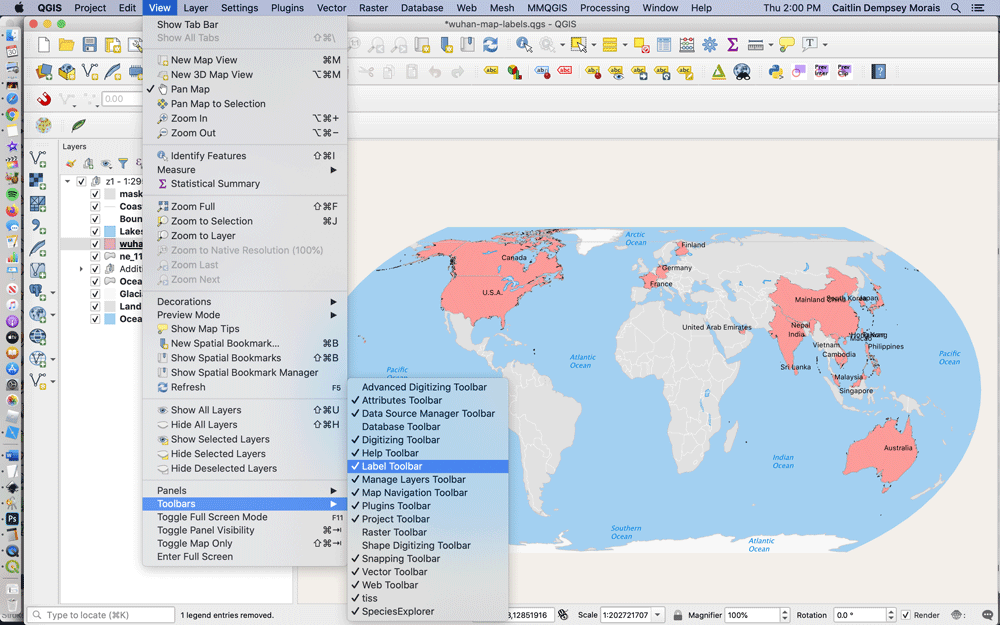
If you don’t already have it enabled, go to View –> Toolbars and make sure the “Label Toolbar” is turned on so you can access the label tools.

Set up the Move Labels Function in QGIS
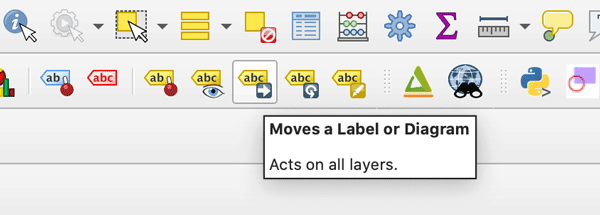
From the toolbar, turn on the tool that moves labels (the icon with abc and a right pointing arrow).

With the layer highlighted in the layers table of contents that you want to create leader lines for, click on any label on that layer. This will bring up an interface where you will select the field that contains a unique ID for each feature in your layer. It’s important to select the correct field or else moving labels will not function properly.

Moving Labels in QGIS
Once you’ve set the unique field, you are ready to start moving labels. Click on a label you want to move. You will see the boundary of the label change to green. As you move your cursor, a green outline of the label space will move with the cursor. When you’ve located a spot on the map where you want the label to be, click again and the label will drop, along with a leader line back to the feature.

Move any labels manually outside of the polygon feature to automatically create leader lines. You can also move labels within a polygon to readjust them. The leader lines only show up once the label is fully outside of the polygon feature.
Video Tutorial: How to Add Leader Lines to Labels in QGIS
More QGIS Tutorials
- How to Add Latitude and Longitude as a CSV File in QGIS
- How to Import an Esri Layer Package in QGIS
- How to Change the Projection of a Shapefile Using QGIS

