All geographic data is tied to some projection or coordinate system. If you know the starting coordinate system or projection of your shapefile, you can quickly export the data into another coordinate or projections system using QGIS.
What Files Are Needed to Reproject a Shapefile?
To start with, you will need a projection file stored in the same directory as the rest of the shapefile files. Despite being in the singular, the shapefile is actually a set of files. All of the files will contain the same name but will have different extensions attached to them.
At a minimum, a shapefile will have three files. The file with the extension .shp contains the geometry information. The .shx file is the index file and the .dbf file contains the attribute information that is attached to geographic information. Shapefiles may have additional files associated with them (More: What is a Shapefile?).
In order for any GIS software application to understand the projection or coordinate system that a shapefile is stored in, you will need to have a file with the same name that has the .prj extension.
When you open up a .prj in a text editor, you will see markup information about the coordinate or projection system:
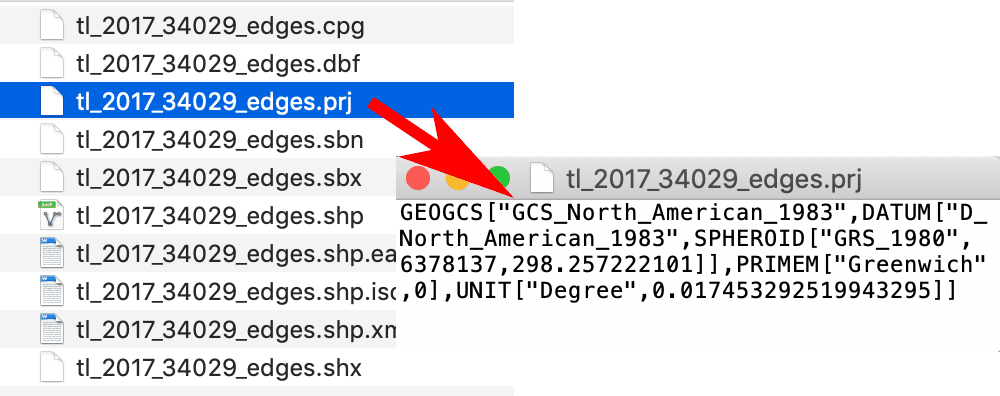
When you load a .shp file into QGIS, the software application will look for all of the associated files located in the same directory that contain the same file name. When you include a .prj file, QGIS will automatically assign the proper coordinate or projection system to the shapefile.
A fresh QGIS project will be assigned the Coordinate Reference System (CRS) for the first geographic file that is loaded. All subsequent files loaded into the QGIS project will be reprojected on the fly the match the project coordinate system.
How to Reproject a Shapefile Using QGIS
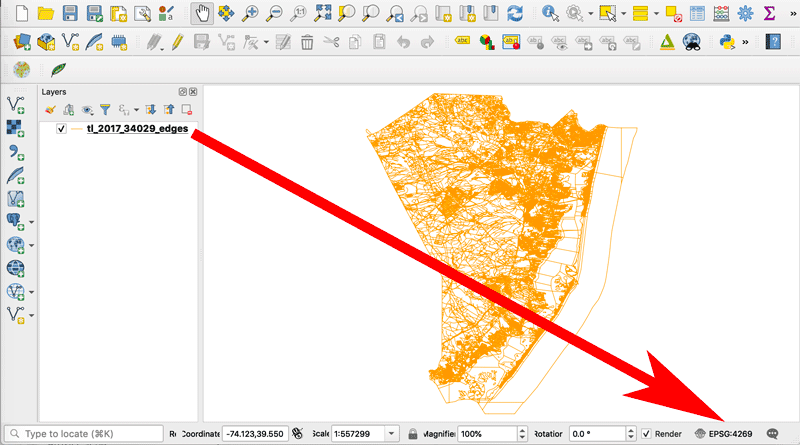
In this example, we will reproject a shapefile to match the existing QGIS project Coordinate Reference System (CRS). First, a shapefile in the desired CRS is loaded into a fresh instance of QGIS. You can see the assigned CRS noted in the lower right hand corner.
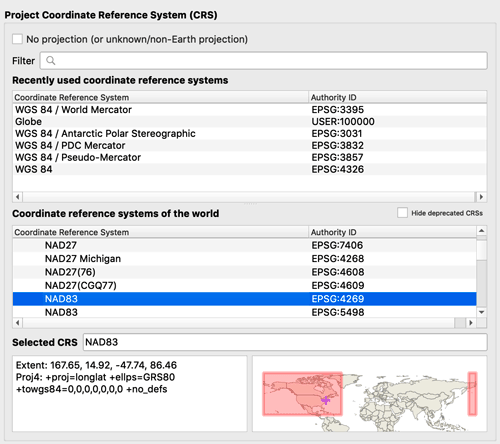
If you click on the EPSG code, the more detail about the CRS will be displayed:
Next, load the shapefile that you want to change the CRS for into the same QGIS project. You will either need to make sure that the shapefile has a corresponding .prj file or you will be asked to manually assign the CRS after loading the shapefile.
As long as you are able to supply accurate CRS information, QGIS will be able to reproject the second shapefile on the fly to the project CRS. This allows all of your GIS files to geographically overlay in your map window.
If you exam the layers properties of the second shapefile, you will see that the file still retains its original CRS information while being reprojected on-the-fly to the project CRS.
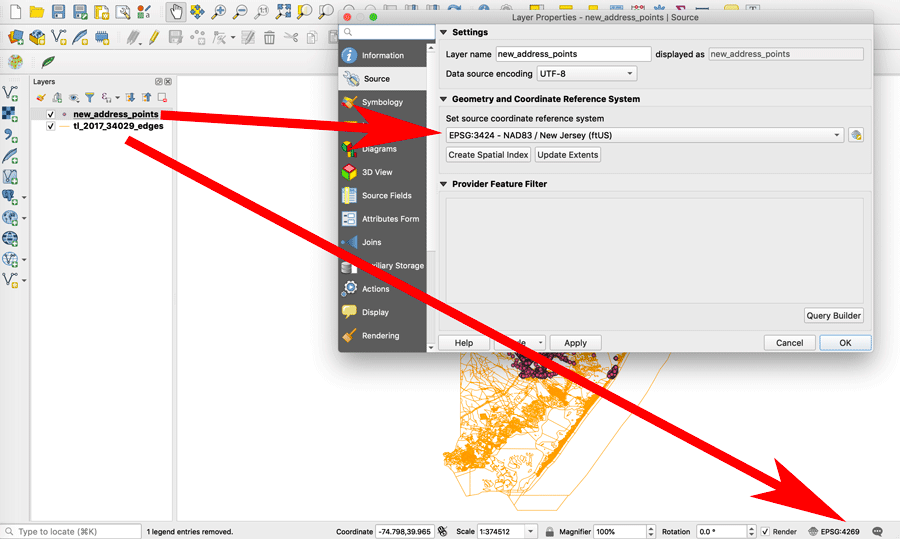
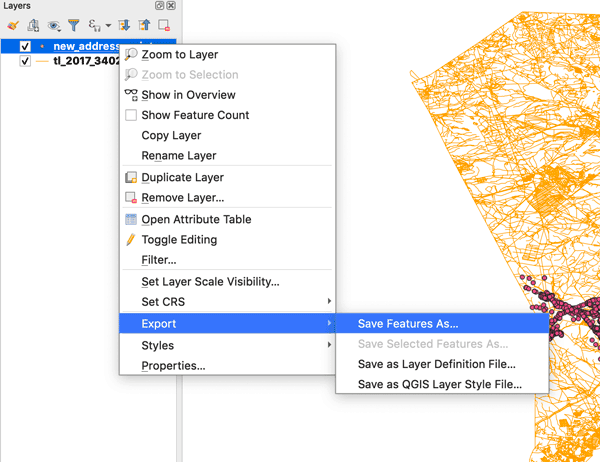
To reproject the CRS of the second shapefile, we will need to export the shapefile to a new file using the project CRS. To start, right click on the shapefile and select Export –> Save Features As
In the Export screen, type in a new shapefile name and click on the three dots next to the File name box to select the folder. Under the CRS dropdown, select the Project CRS as the assigned CRS.
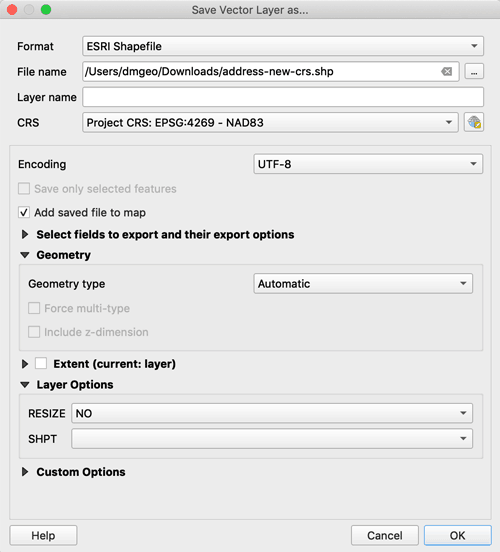
Click on the OK button and your new shapefile will be exported into the designated CRS. Open the .prj file associated with the new shapefile in a text editor and you will see the new CRS information.


