The use of deep learning techniques in ArcGIS Pro has provided promising results in the classification of land cover, a critical aspect for understanding and managing the Earth’s surface.
Land cover classification maps are widely used in environmental and urban planning, natural resource management, and disaster management. The use of deep learning techniques such as Convolutional Neural Networks (CNNs) and Deep Belief Networks (DBNs) have become essential for accurate and efficient classification of land cover with the availability of high-resolution satellite imagery. These techniques have the potential to improve the accuracy and speed of the land cover classification process, leading to better decision-making and policy outcomes.
Step-by-step instructions for classifying land cover in ArcGIS using satellite imagery
The integration of deep learning techniques in ArcGIS Pro has enabled users to process large amounts of satellite imagery and extract relevant information about land cover features in a faster and more precise way. This tutorial provides a step-by-step approach for using Landsat 8 (L1 and L2) data for landcover classification in ArcGIS Pro by incorporating pre-trained deep learning models.
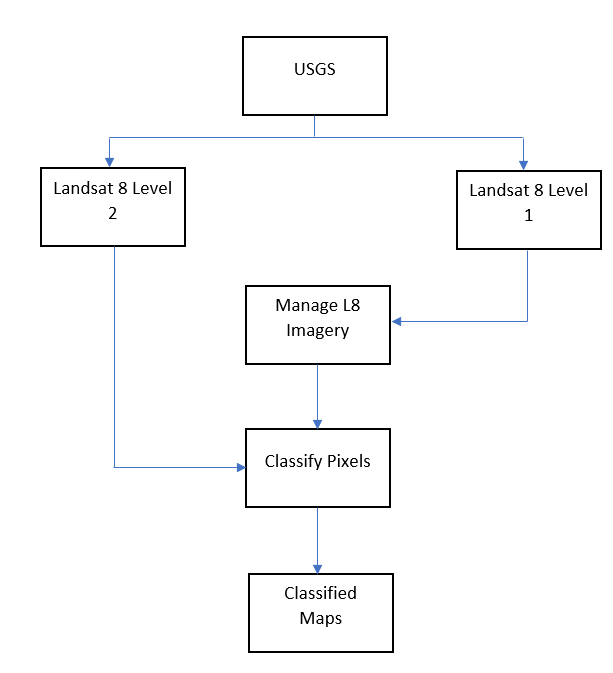
Using deep learning libraries in ArcGIS Pro
To be able to run deep learning in ArcGIS Pro, your will first need to retrieve and install the deep learning libraries using the outlined steps:
- Be sure to check the version of ArcGIS Pro by selecting Project on the menu bar.
- Select “About” from the pool of options.
- Once checked, visit: Esri/deep-learning-frameworks: Installation support for Deep Learning Frameworks for the ArcGIS System
- Select “Downloads for previous releases” to retrieve deep learning libraries compatible with ArcGIS Pro versions of 3.0.2 or less.
- Extract the retrieved archived file and install.

Landsat 8 (Level 1) data for landcover classification in ArcGIS Pro
Landsat 8 imagery for Level 1 and Level 2 can be retrieved from the United States Geological Survey (USGS) Earth Explorer’s website after a free sign up. You can sign up via the USGS’ EROS Registration System.
Use the steps outlined to access Landsat 8 (Level 1) imagery data for any area of interest:
- From the Search Criteria interface, select Geocoder.
- Select Address/Place as the geocoding method.
- From the address bar, type and search your location of interest.
- Be sure to set the date range to specify the timelines of the Landsat imagery to be downloaded.
- Ensure that cloud cover percent is set to “less than 10%.”
- Select the Datasets tab.
- Select Landsat.
- Select Landsat collection 2 Level 1 and check the box for Landsat 8-9 OLI/TIRS C2 L1.
- Also, select Landsat collection 2 Level 2 and check the box for Landsat 8-9 OLI/TIRS C2 L1.
- Toggle to the search results for a download.
This video provides information on how to retrieve Landsat 8 imageries from USGS, use the attached video link.

To import the Landsat 8 L1 imagery for landcover classification:
- Open and create a new project in ArcGIS Pro.
- “Manage Landsat 8” python script can be retrieved from ArcGIS Hub’s Manage Landsat 8 imagery page. This tool helps to create a mosaic dataset for the Landsat 8 L1 for the classification.
- To import, the mosaic dataset tool in ArcGIS Pro, select the Insert tab from the menu bar.
- Select “Add toolbox” from the toolbox drop-down options.
- Toggle to the location of the downloaded mosaic dataset tool.
- Click Ok.
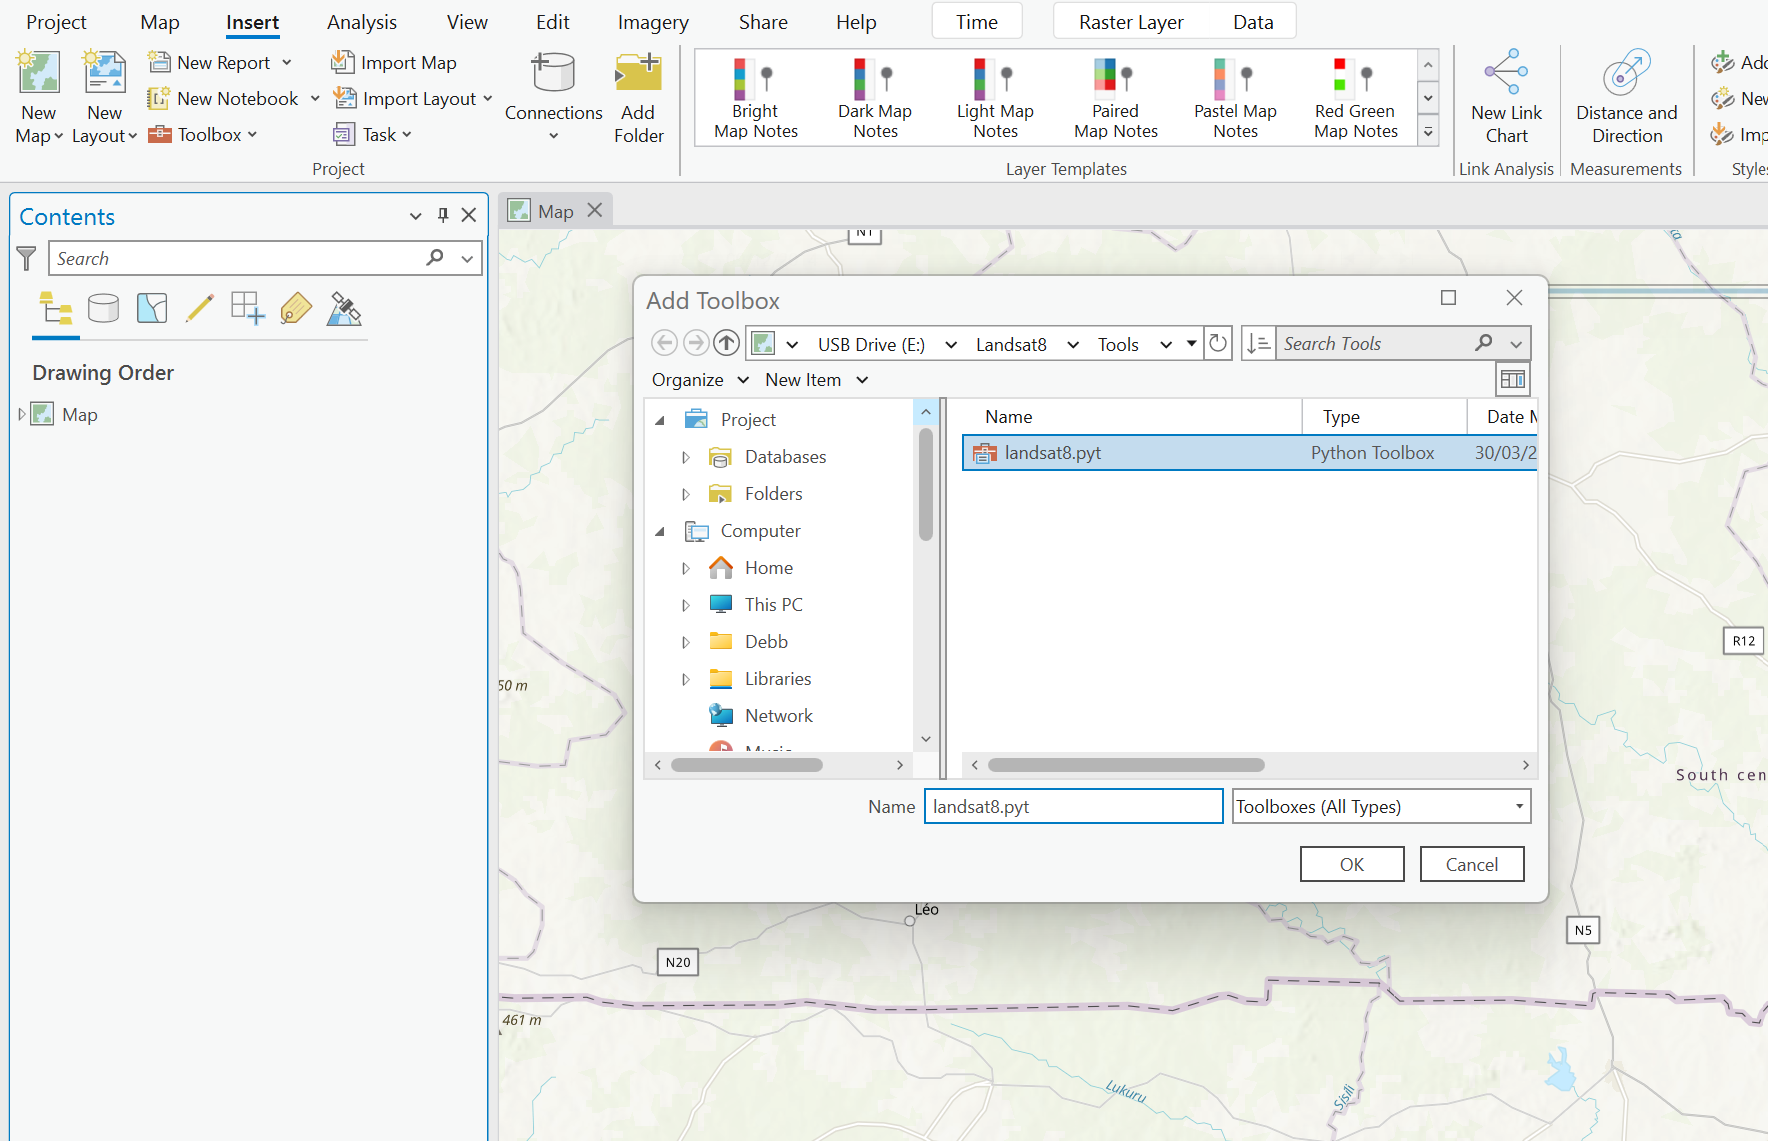
To use “manage Landsat 8” tool for mosaicking, perform composite bands (stacked image) of the Landsat 8 (L1) data:
- Type and search composite bands from the search bar of the geoprocessing toolbox.
- Set input rasters to the bands of the Landsat 8 L1 imagery.
- Set output raster to your desired output name and location.
- Click Run.
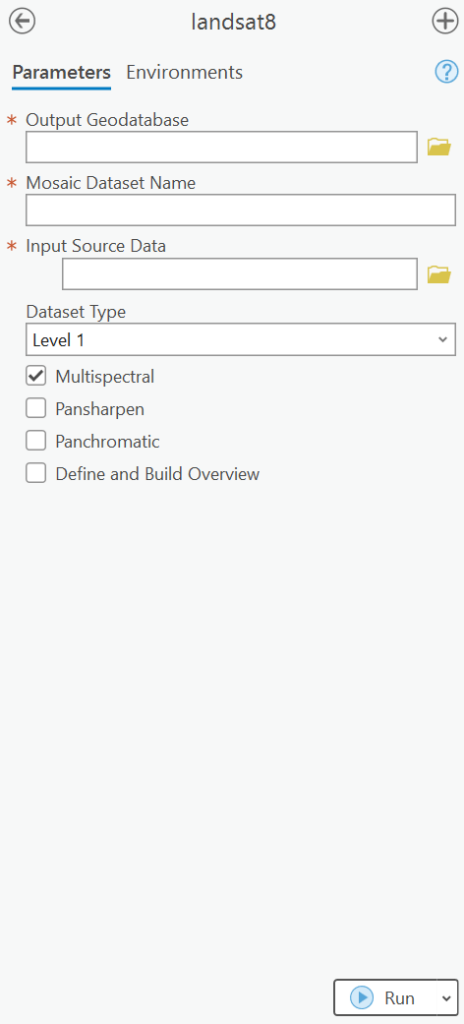
- Type and search “landsat8” from the search bar of the geoprocessing toolbox.
- From the tool window, set “output geodatabase” to the file geodatabase in use.
- Set a Mosaic Dataset Name.
- Set input source data to the stacked image.
- Set Dataset type to Level 1.
- Type and search “classify pixels using deep learning” in the search bar of the geoprocessing toolbox.
- Set input raster to the mosaicked dataset.
- Set output raster.
- Set model definition to your landcover classification.dplk file. Retrieve the .dplk file from the ArcGIS Hub Land Cover Classification (Landsat 8) page.
- Set processing mode to process as mosaicked image.
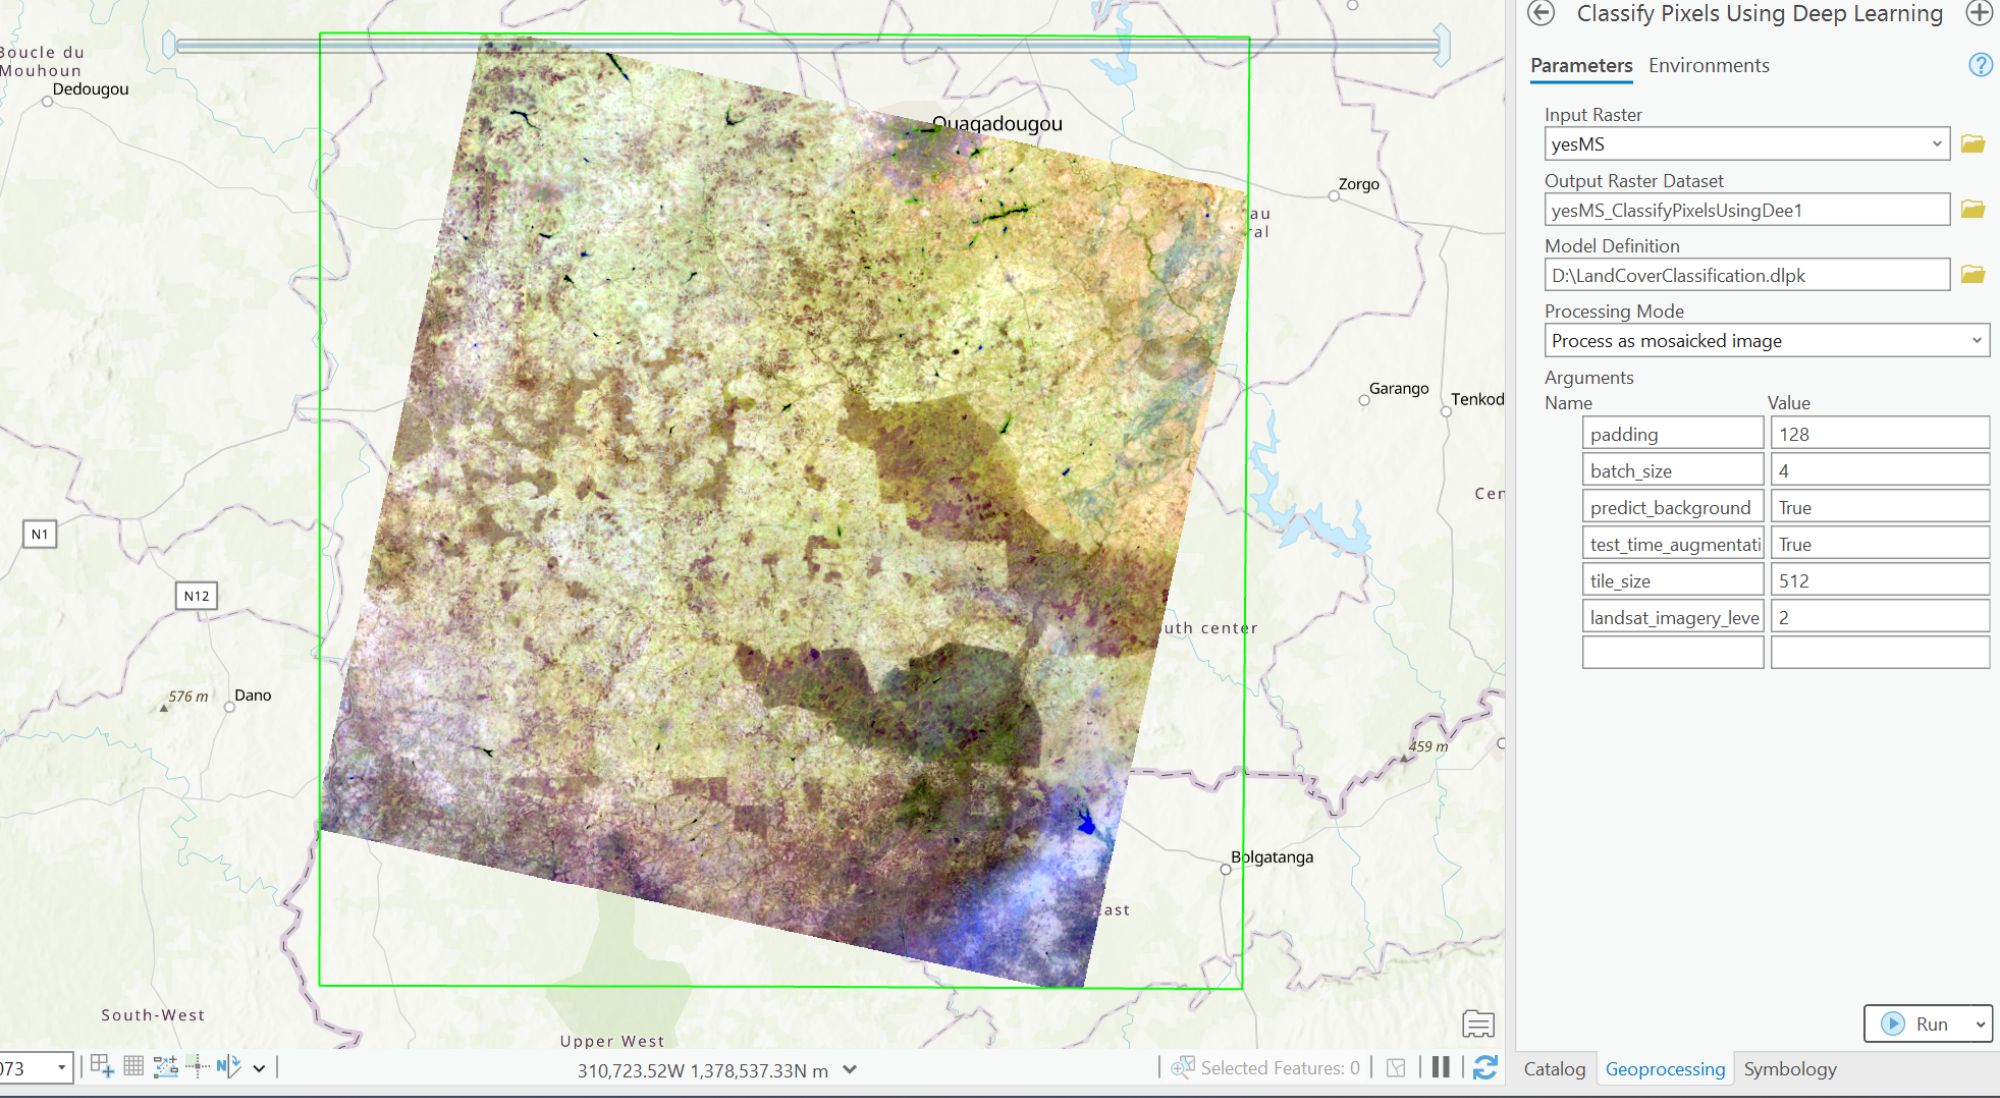
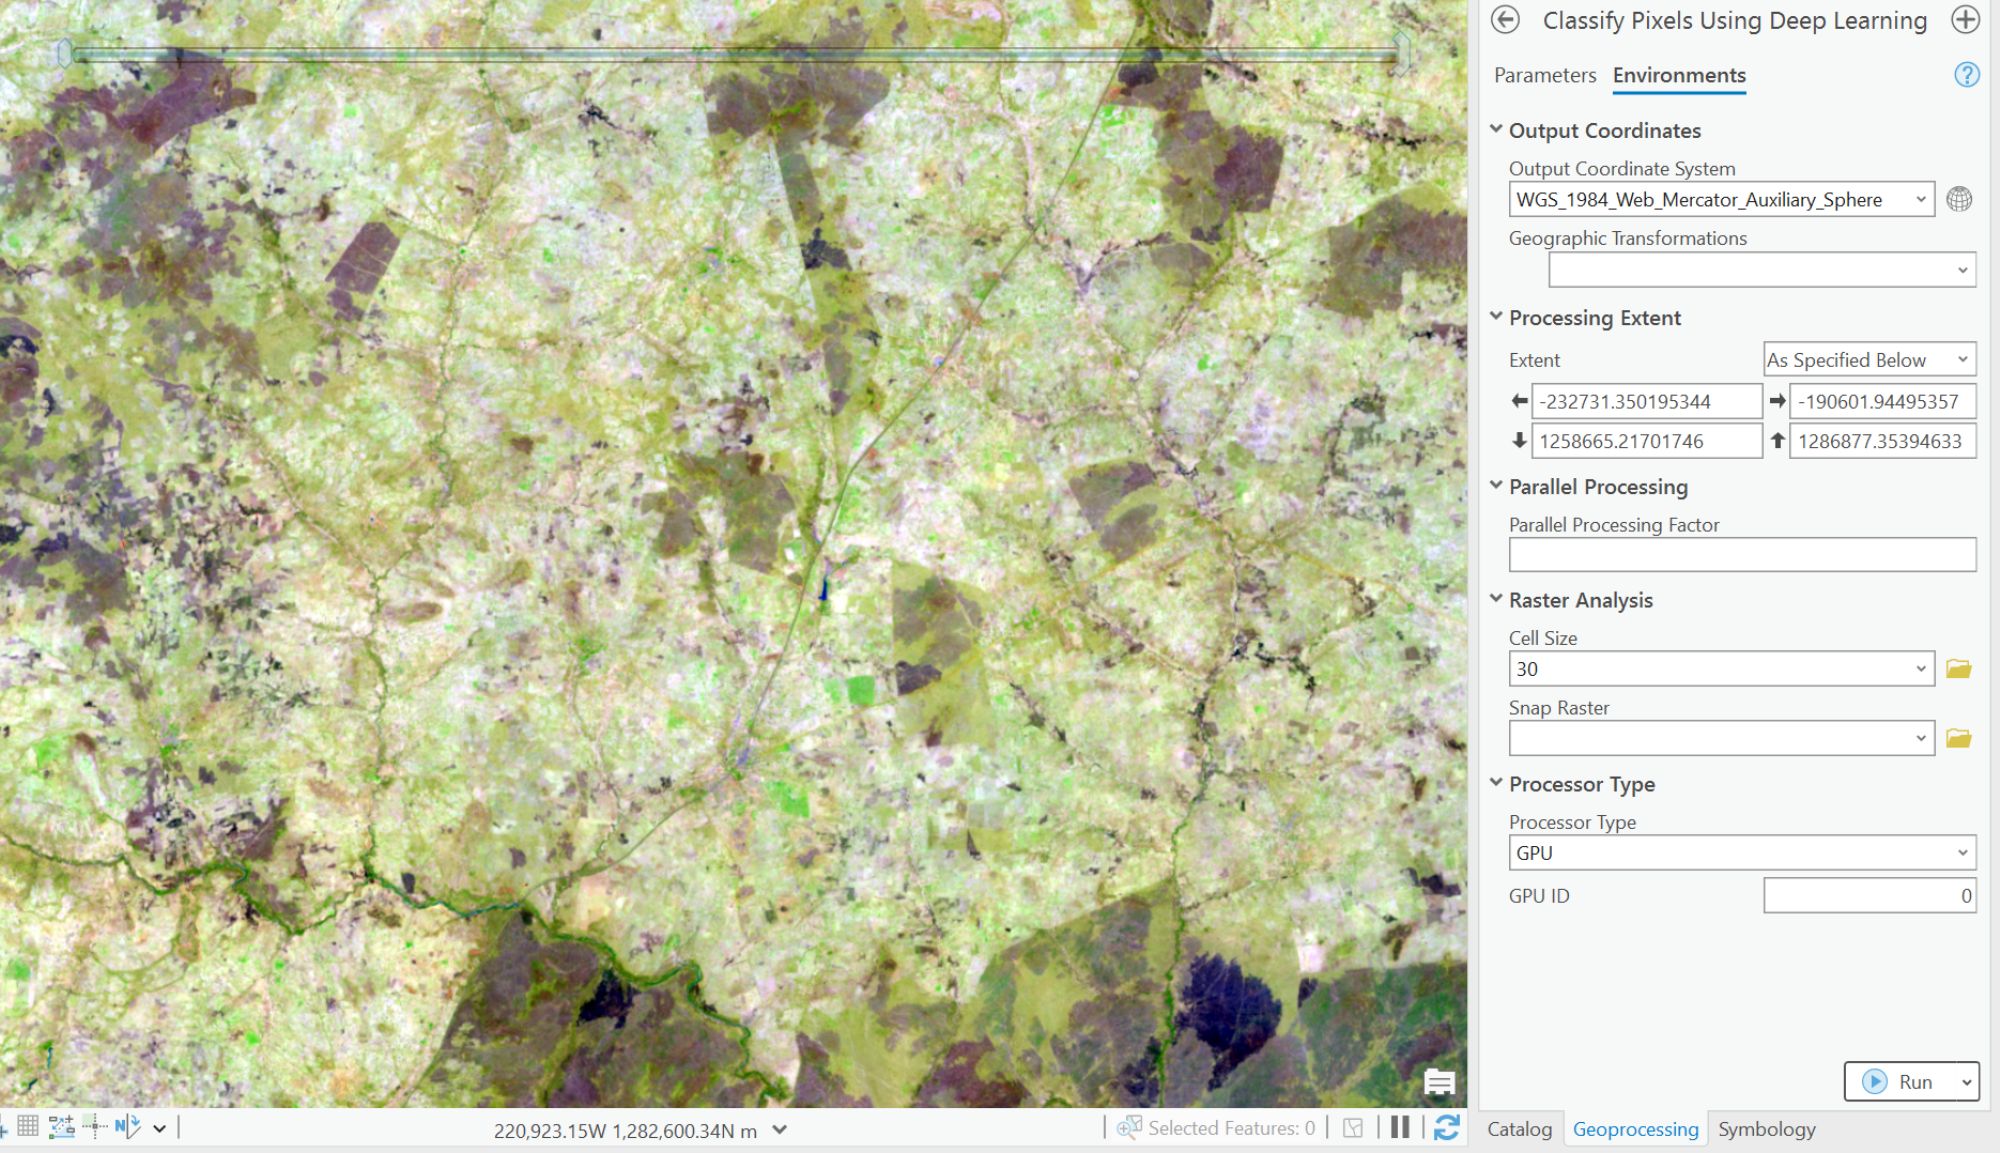
- From the Environments tab, Set processing extent to as specified below.
- Set Cell size to 30.
- Set Processing type to GPU.
- Click Run.
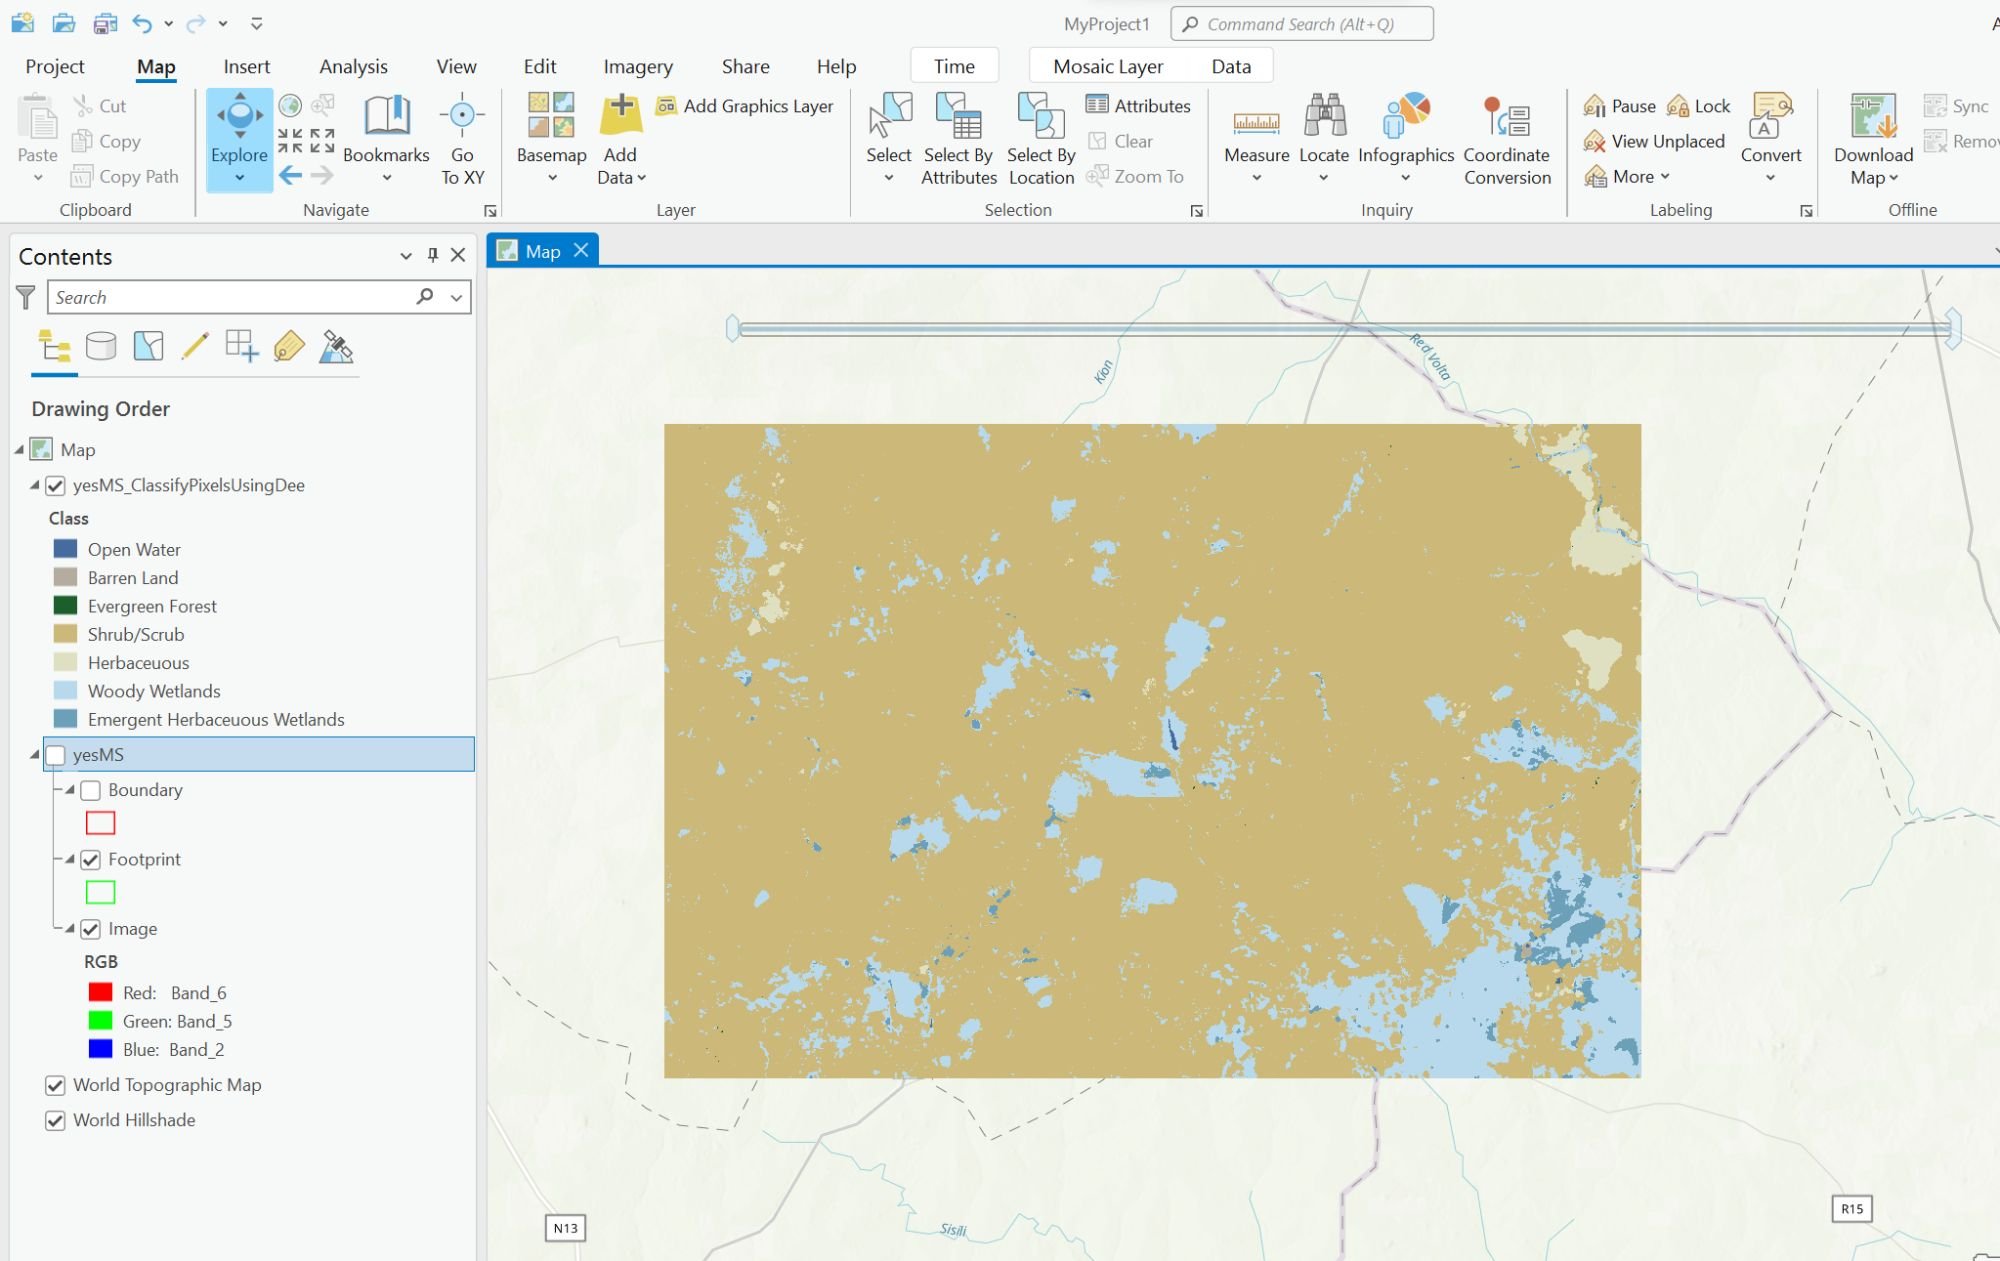
Resulting land cover classification
The end result is a layer with land cover classifications with a default color scheme that correspond to the different Landsat 8 pixel values of the imagery you used. For example, the imagery being used for this tutorial shows an image that predominately contains pixel values indicating the area is mostly shrubland (dark tan color).
Landsat 8 (Level 2) data for land cover classification in ArcGIS Pro.
For this part of the ArcGIS Pro tutorial, Surface Reflectance of the Landsat 8 Level 2 MTL file is used for the landcover classification process.
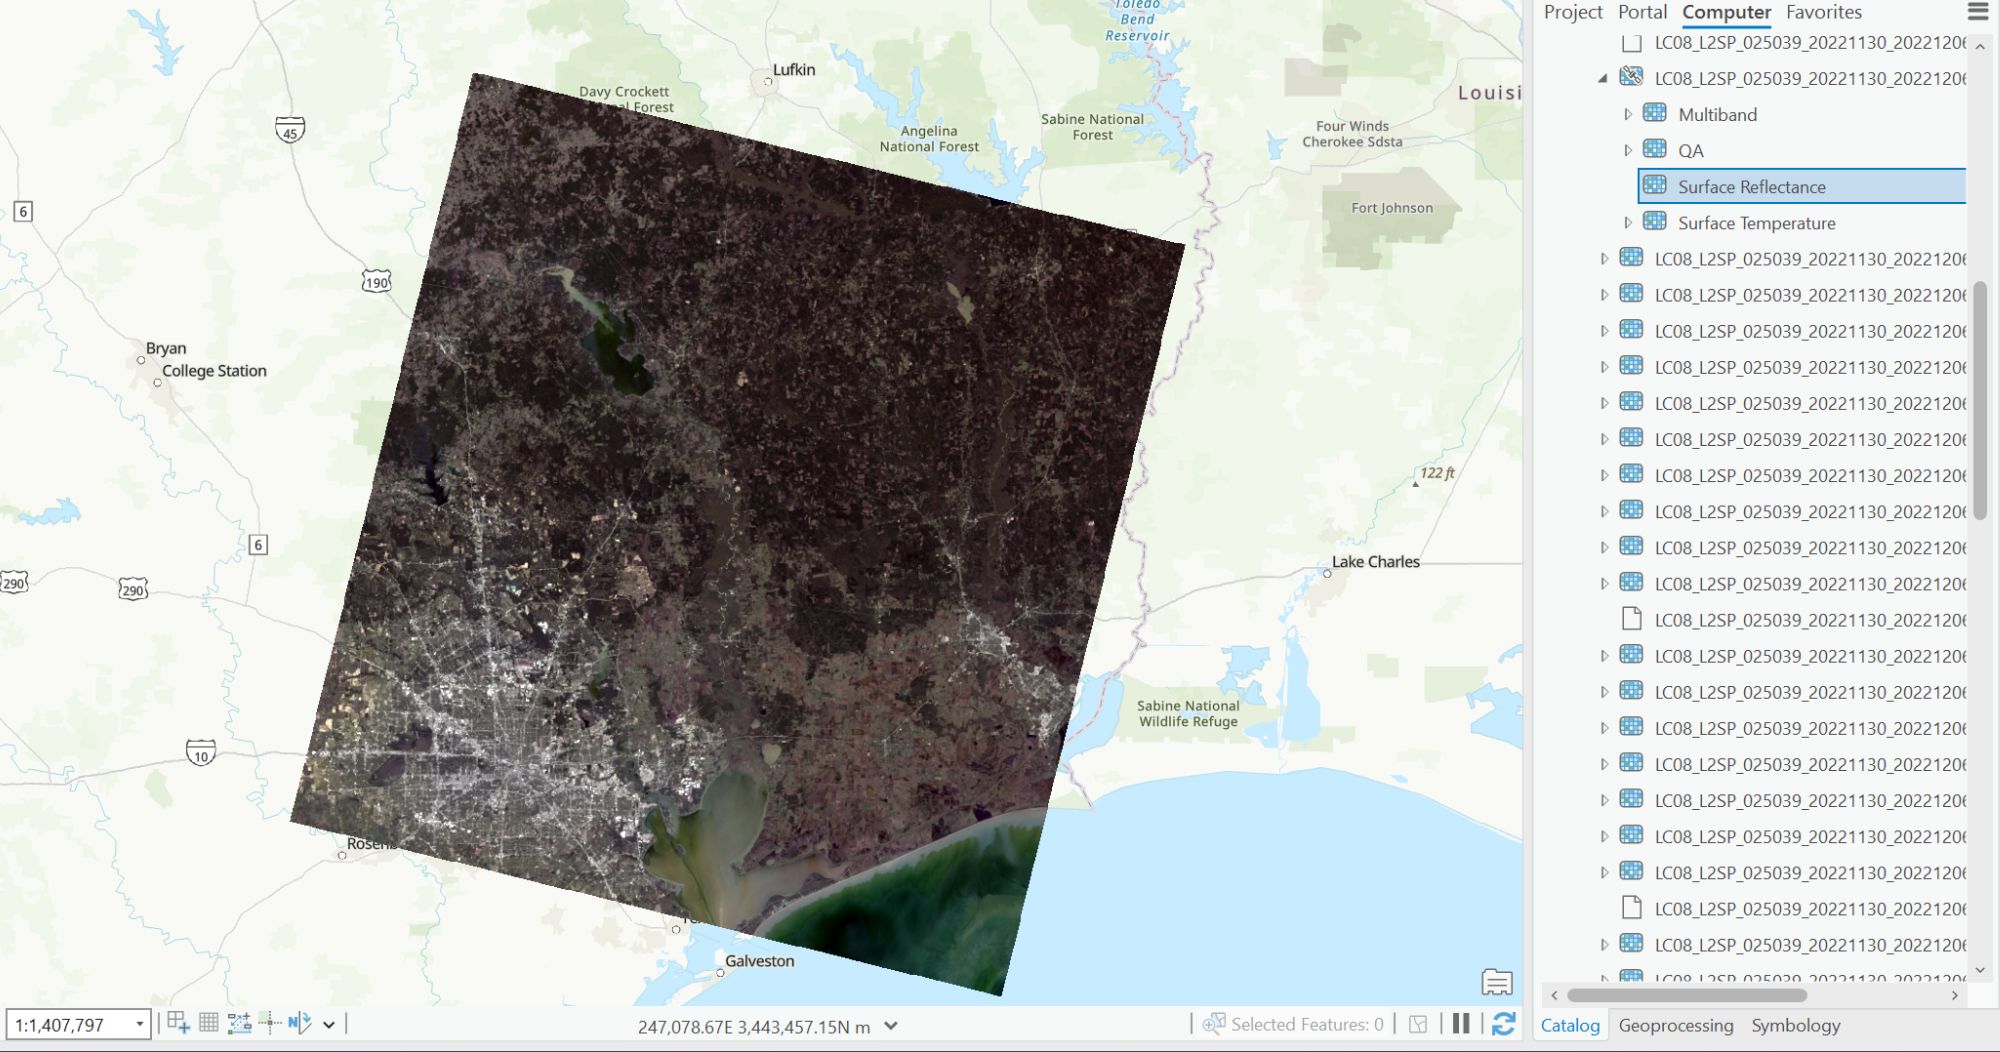
- To import Surface Reflectance, open the catalog pane from the View tab of the Menu bar.
- Toggle to the Surface Reflectance of the MTL file.
- Drag and drop onto the map canvas.
- Type and search “classify pixels using deep learning” in the search bar of the geoprocessing toolbox.
- Set input raster to the Surface Reflectance file.
- Set output raster to your desired output name and location.
- Set model definition to the landcover classification.dplk file.
- From the Environments tab, Set processing extent to as specified below.
- Set Cell size to 30.
- Set Processing type to GPU.
- Click Run.
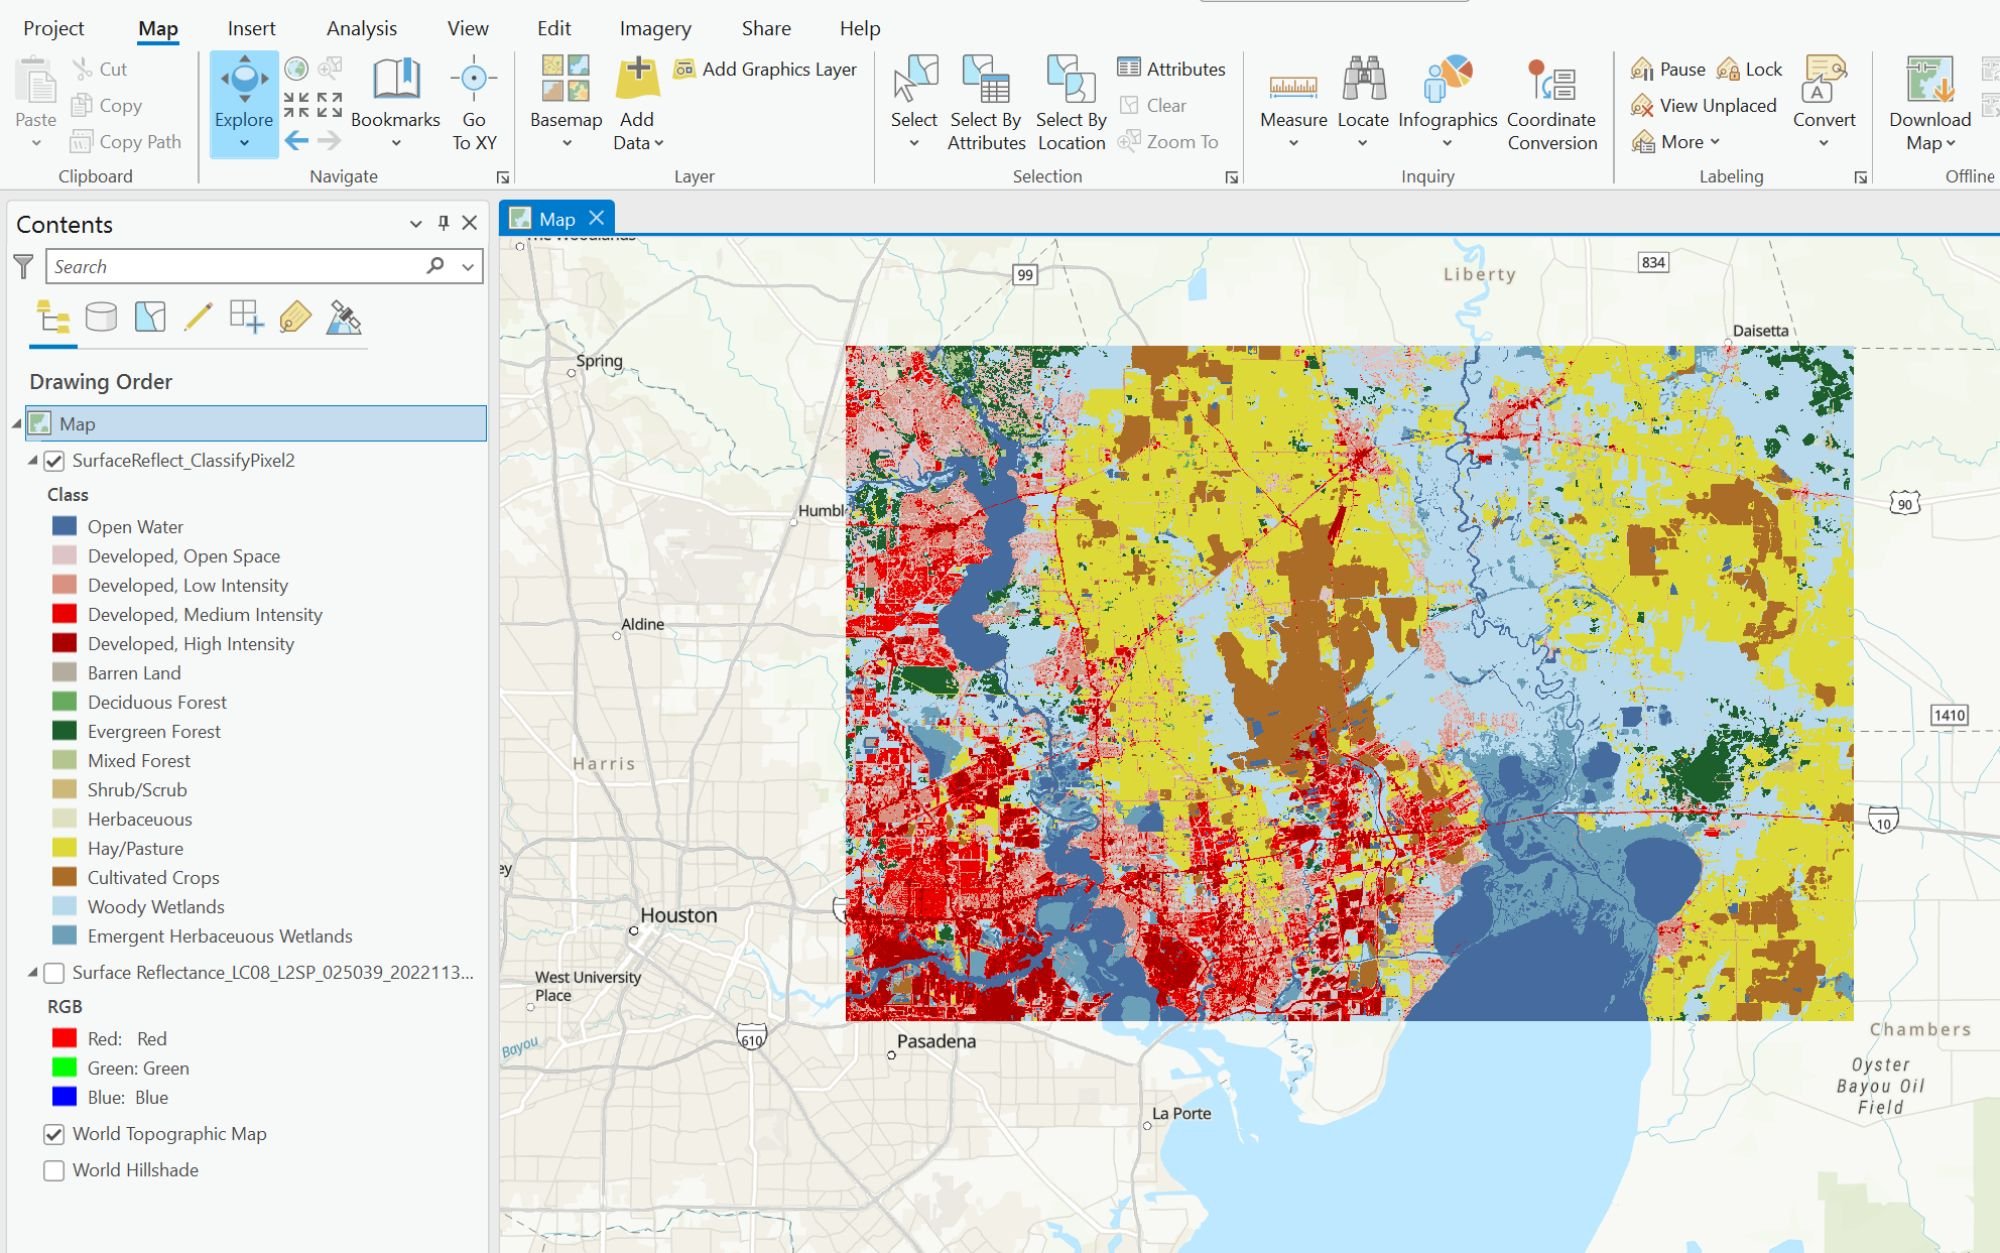
To review the accuracy measures of this model, visit the Land Cover Classification (Landsat 8) – Overview page on ArcGIS Hub.
