Dissolving features based on attributes is a common task in GIS software programs that allows you to combine or merge multiple features into a single feature based on a shared attribute value.
This process is particularly useful when working with polygon layers, where adjacent polygons with the same attribute value can be dissolved into a single feature to reduce complexity and improve visualization.
Dissolving features can help you to simplify the data and reduce unnecessarily large file sizes.
Using GIS software to dissolve polygon features
GIS software programs, such as QGIS and ArcGIS, provide tools for dissolving features based on attributes. These tools allow you to specify the attribute field to use for dissolving, as well as other parameters, such as the dissolve method and output geometry type.
QGIS, for example, provides a dissolve tool that allows you to dissolve features based on a selected attribute. The tool also provides options for choosing the output layer and setting the dissolve parameters.
When dissolving features based on attributes, it is important to choose the correct attribute and dissolve method to ensure that the resulting feature accurately represents the data.
How to dissolve polygon features in QGIS
Here is a short tutorial using a zone layer for the Universal Transverse Mercator (UTM) projection system.
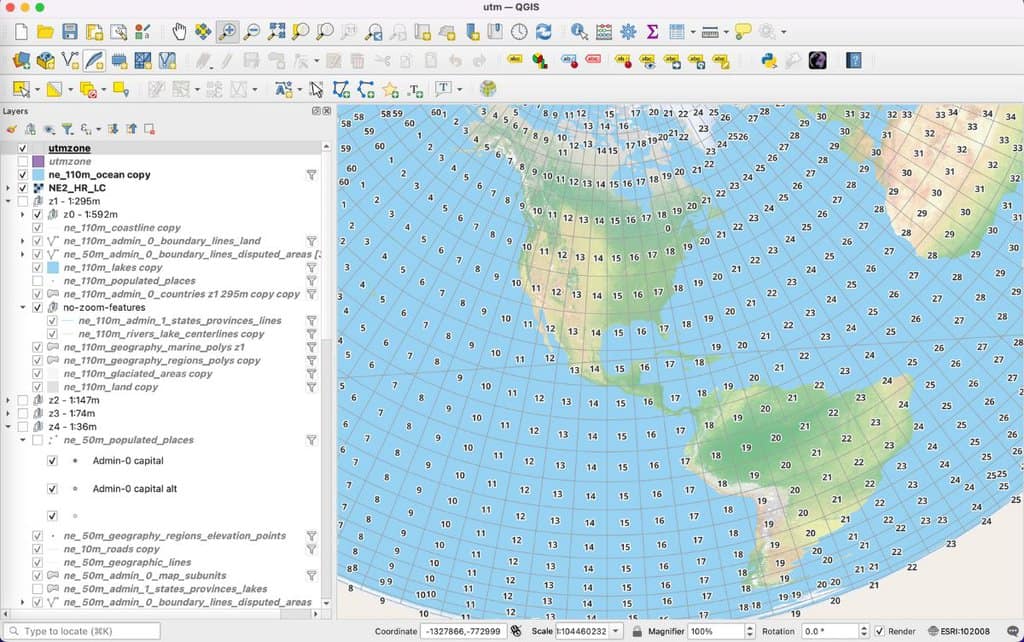
Here is a simple map in QGIS showing a GIS data set that maps out the UTM zones but also has row information.
Universal Transverse Mercator (UTM) is a coordinate system used to represent locations on the Earth’s surface. It divides the Earth into 60 zones, each 6 degrees wide in longitude, and uses a metric Cartesian coordinate system to specify locations within each zone.

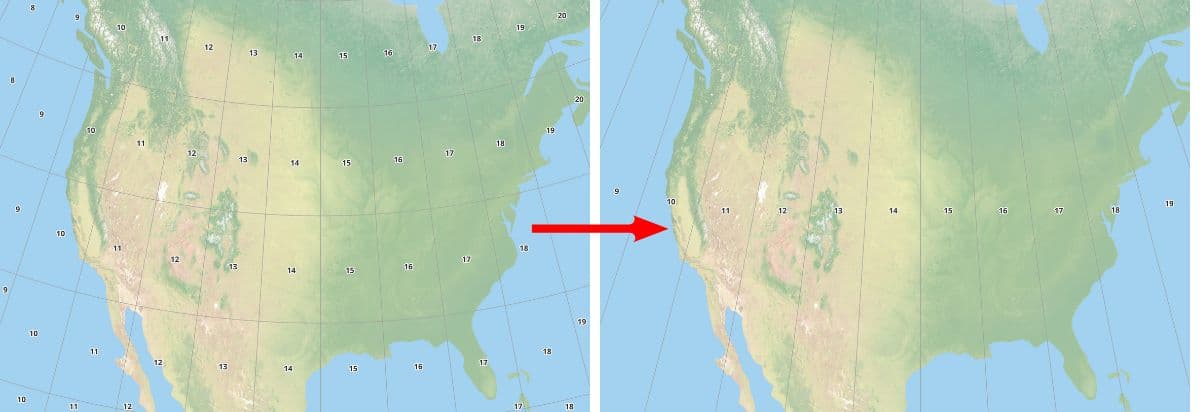
We are going to dissolve the features based on the “zone” field so that the rows are removed.
To dissolve a feature based on the attributes in a field, first click on the layer in the left hand side where the list of layers are shown in a QGIS project.
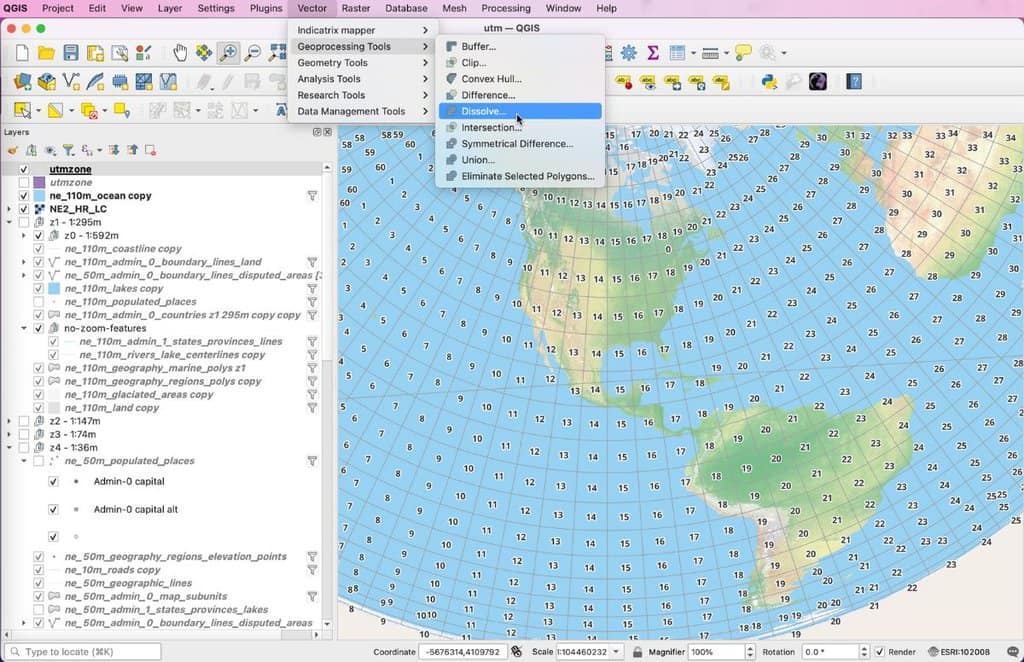
Then go to the top QGIS menu options and select Vector –> Geoprocessing Tools –> Dissolve….

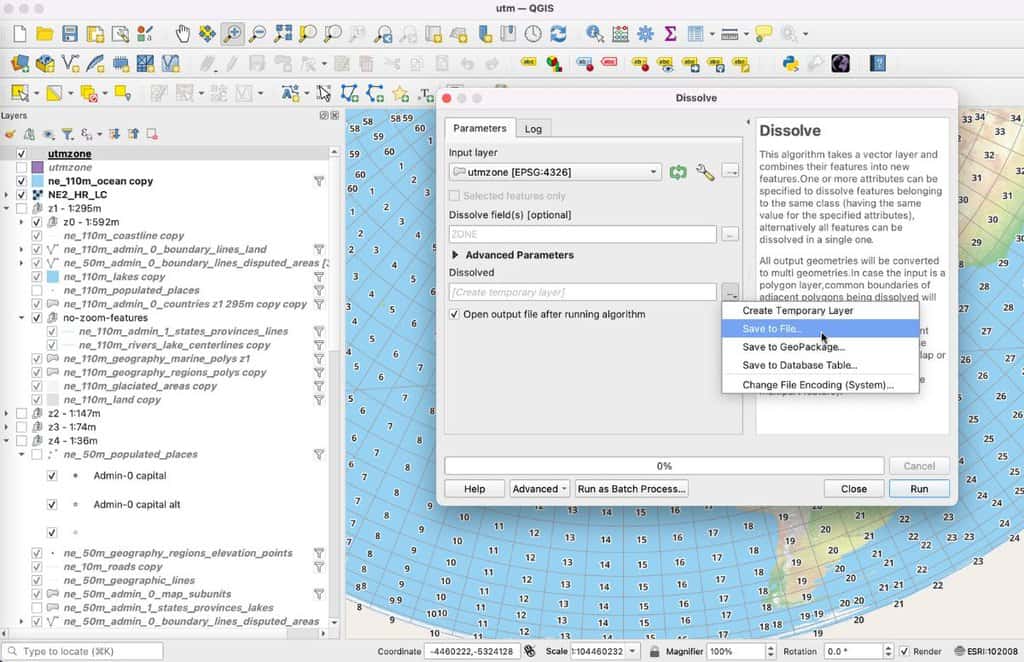
In the graphic user interface (GUI) that pops up, select the “zone” field to dissolve features on.
Under the “advanced” option, you can select the “keep disjoint features as separate” if you have polygons with the same attribute that are not overlapping or adjacent to each other. This means that any features in the layer that do not share a common boundary with another feature will be kept as separate features.
Next, select either the default of a temporary file or click on the … next to the dissolved text box to designate where you want the new GIS file to be stored.

Once the parameters for the dissolve tool have been set, click on the “Run” button. A status bar at the bottom of the Dissolve interface will let you know the progress. The more polygons there are to dissolve, the longer the process will take.
When QGIS has finished dissolving the polygons based on common attributes in the field(s) selected, the new file will be automatically added to the project file.

Quick answer summary: How do I dissolve polygons in QGIS?
To dissolve small polygons in a vector layer, you can use the QGIS dissolve tool in the Geoprocessing Tools menu. Select attribute field to dissolve based on, set any advanced options as needed, choose the output file location, and run the tool. Make sure to choose the correct attribute and dissolve method for accurate results.
This article was first published on March 9, 2023.
